
How to Remove Furniture From Photos for Real Estate Listings
By PROMOREALTOR · Updated · 10 min read
Sometimes the seller's furniture hurts the sale. Sometimes you want an empty room to stage. Either way you have five ways to take furniture and clutter out of a listing photo. Below: what each costs, the mistakes that give an edit away, and the labelling rules that now apply.
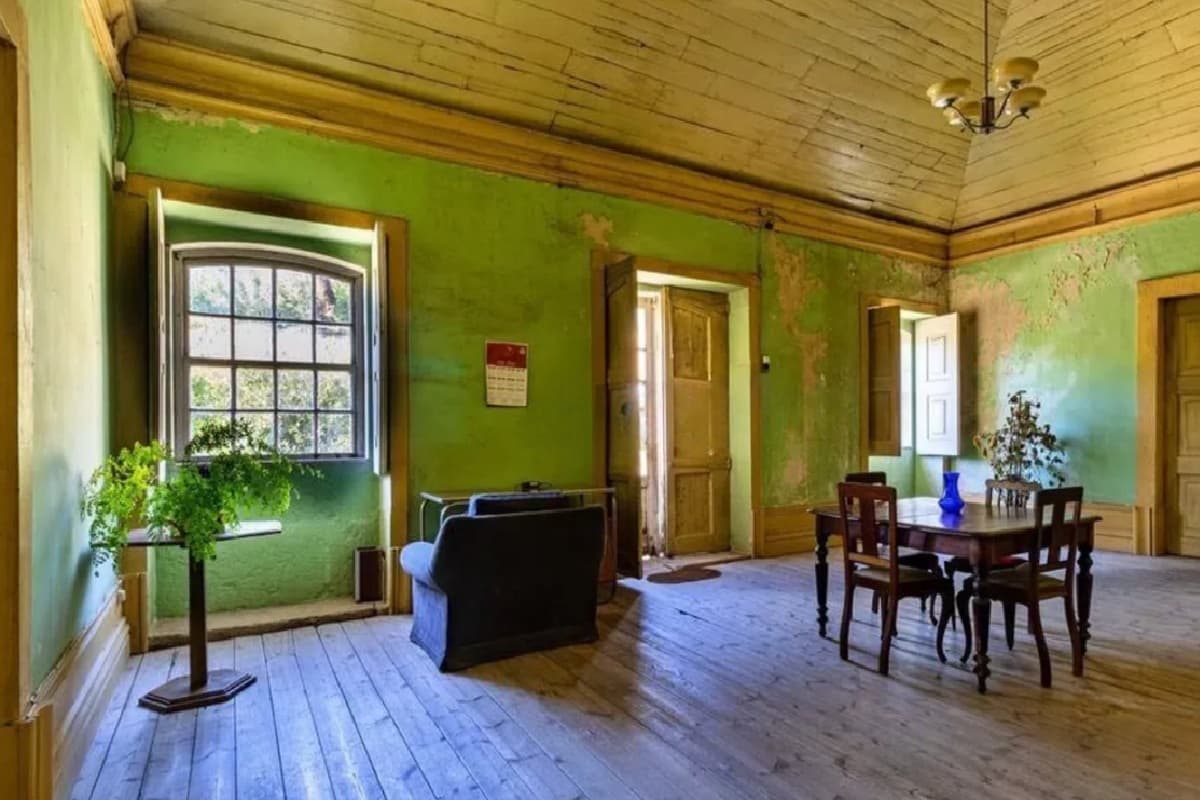 Before
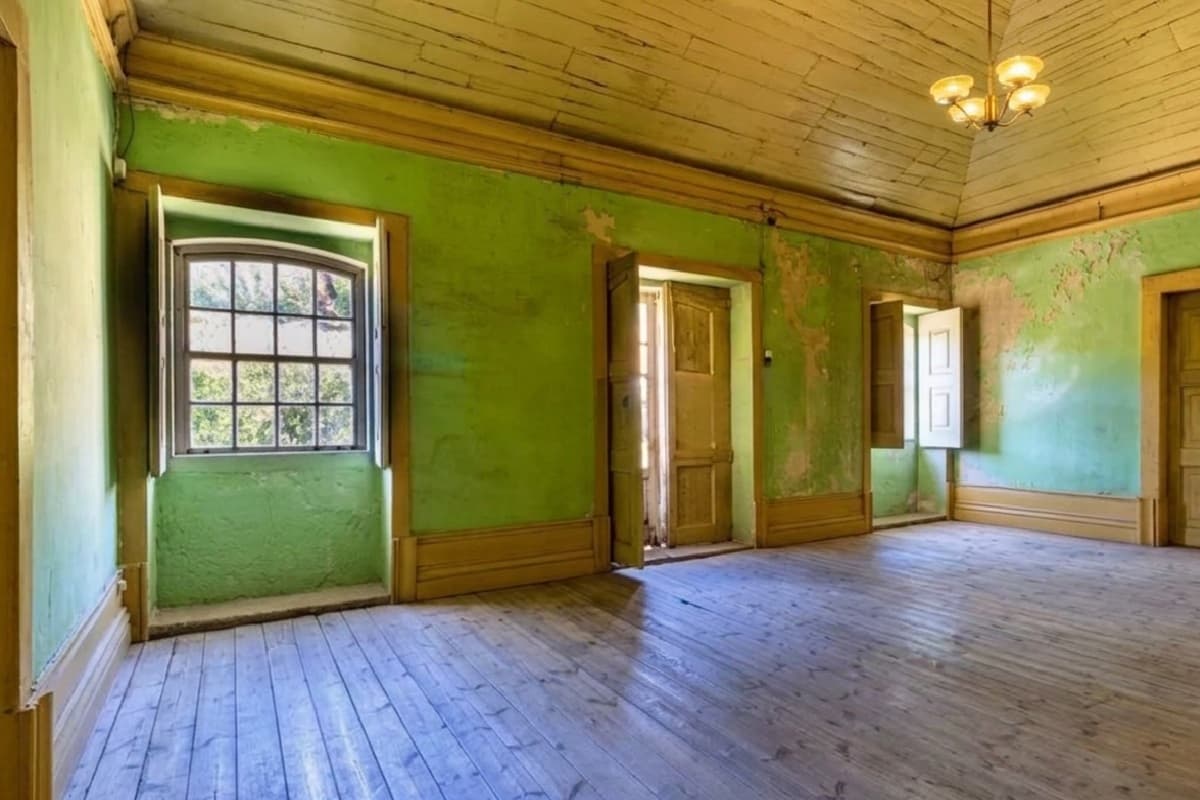 After
AfterWhy remove furniture from real estate photos
Three reasons keep coming up. The seller's furniture is dated, or it swamps a small room. The room is cluttered, and the clutter is the first thing a buyer sees. Or you want an empty room so you can stage it virtually in a style that suits the buyer.
Removal is also the edit that most easily crosses a line. Taking out a sofa prepares a room for staging. Taking out a stain or a crack misrepresents it. The sections below keep that difference in view.
Five ways to do it
| Method | Cost | Skill | Best for |
|---|---|---|---|
| 1. Move it out before the shoot | Free, plus time | None | Any listing you can clear. Always the best result |
| 2. Desktop software (clone, content-aware, generative fill) | Software plan plus your time | High | Photographers who edit every day |
| 3. Phone apps | Often free or low cost | Low | Quick social posts, rarely MLS photos |
| 4. Human editors | BoxBrownie lists item removal at €10, or €5 for one or two small items 4 | None | Difficult rooms and a person's judgement |
| 5. One-click AI | 1 credit (€1) a photo at PROMOREALTOR; no subscription | None | Fast removal when you can't move the furniture |
Prices read on 2026-10-09. Software and app prices change often, so check the vendor.
How to do it in PROMOREALTOR
Four tools cover removal. Each is one credit and about 30 seconds.
- Empty This Room removes all the furniture and leaves a clean room.
- Declutter This Room clears the mess and keeps the room tidy and minimally furnished.
- Declutter Exterior removes cars, bins and cables from the front of the house.
- Mirror Miracle removes the photographer from a mirror reflection.
 Before
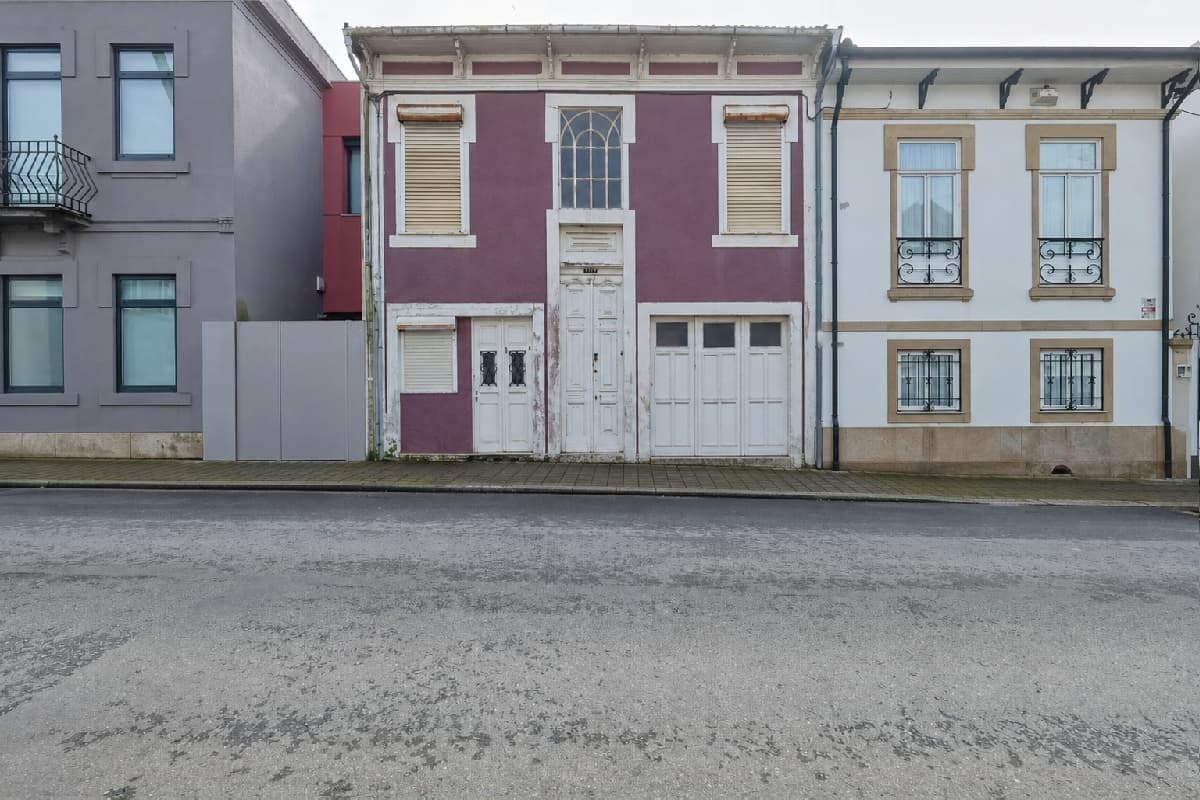 After
AfterUpload the photo, pick the tool, press RUN and compare the before and after. If a result is wrong, run it again. A failed run is refunded. More on the decluttering tools.
What the AI rebuilds behind the object
When furniture disappears, the tool has to invent what it hid: floor, wall, skirting, shadow. That's where edits give themselves away.
BeforeAfterIn this result the armchair, the table, the chairs, the plants and the calendar are gone, and the floorboards and walls carry on convincingly. One detail changed that's easy to miss: the light fitting on the ceiling was redrawn with a different shape. Check ceilings and fixtures every time.
Seven things to check
- The floor behind the furniture. Boards, tiles or carpet should continue without a patch or a blur.
- The wall base. Skirting boards should run straight and join up.
- Shadows. A leftover sofa shadow on an empty floor is the classic tell.
- Reflections. Mirrors, windows and glossy floors may still show the removed object.
- Marks and cables. Stains, sockets and cables should look like the original, not tidied away.
- Fixtures. Light fittings, radiators and curtain rails should match the original.
- Scale. Does the room still read as the same size?
What you must label
Removing furniture counts as an alteration at CRMLS. Its FAQ says virtually clearing furniture that won't stay with the property is a digitally altered image. You label it in the photo description and put the unaltered, furnished original right before or after the edit 1. ARMLS lists removing items among its examples of altered interiors, and removing objects such as trash cans among altered exteriors 2.
A guide from the San Francisco Association of REALTORS lists decluttering or removing unattached items among permitted edits that need no disclosure 3. That conflicts with the CRMLS text. When two rules disagree, use the stricter one. A label costs nothing. A CRMLS violation first gets a warning, then a $250 fine if you don't fix it 1.
Prepare the photo so removal works
- Shoot straight on and at a level height. Tilted photos make floor and wall continuation harder.
- Take the photo in good light. Dark corners hide detail the tool needs.
- Move small items yourself: cables, bins, laundry, personal papers. It's faster than editing them out.
- Keep a clean, unedited copy of every photo. You'll need it for the label and the adjacent upload.
Step by step: clear and stage one room
- Take a straight, well-lit photo of the room from a corner. Keep the floor edges and windows in the frame.
- Sign up and open the decluttering tools. Choose Empty This Room and upload the photo.
- Press RUN. After about 30 seconds you see a before and after.
- Check the floor, the wall base, shadows, reflections and fixtures against the original.
- If it's right, download the result. If not, run it again.
- To furnish the cleared room, upload the result to Virtual Staging and pick a style.
- Label the final image in the description and keep the furnished original for the adjacent upload.
That's two credits (€2) for a cleared and staged room, with no subscription.
Talking to the seller about it
Sellers care about their furniture. A short, honest script keeps it easy: "We'll photograph the home as it is, and for a few photos we may digitally clear the space so buyers can see the room. Each of those photos will be labelled, and the original will sit next to it." That covers the seller's worry and the label rule in two sentences.
Special cases
- Occupied homes. Clear personal items and papers before the shoot. Edit only what you can't move.
- Rentals. Show the unit as it will be let. If the tenant's furniture goes, say so. If it stays, keep it.
- New builds. Often empty already. The next step is staging, not removal.
- Estate and probate sales. Furniture may be part of the sale. Removing it from the photo can mislead, so ask what's included.
- Furniture that stays. If it stays with the property, keep it in the picture.
Time and cost for a whole listing
A listing with five cluttered rooms and a front with cars is six photos. At one credit (€1) each, that's €6 and about three minutes of waiting, plus the time to check each result. A human editor at €5 to €10 an item removal would charge €30 to €60 for the same six photos at BoxBrownie's prices 4, with a day or so to wait. The saving is real. The checking isn't optional.
Should you remove it, or stage it?
A cleared room can feel bare. Many agents remove the old furniture and then furnish the room in a new style. That's two edits, two credits, and a label on the result. The virtual staging cost guide compares prices, and the before and after guide shows real results. Fix the sky and the light too with one-click photo editing.
Frequently asked questions
Can I remove furniture from a listing photo?
Yes, but label it where your MLS requires. CRMLS counts virtually clearing furniture as an alteration that needs a label and the original beside the edit 1.
How much does it cost to remove furniture from a photo?
BoxBrownie lists item removal at €10, or €5 for one or two small items 4. PROMOREALTOR charges 1 credit (€1) a photo.
Is removing clutter the same as removing furniture?
The sources disagree. One guide treats decluttering unattached items as exempt 3, while CRMLS counts virtually clearing furniture as altered 1. Follow the stricter rule.
Will the floor look right where the furniture stood?
Usually the tool continues the floor and the wall base behind the object, but check for patches, blurs and leftover shadows at full size. Dark or cluttered photos make the rebuild harder.
Is removing furniture misleading?
It can be, if the furniture stays with the property or if removal hides a defect. Remove only what won't be part of the sale, label the photo, and keep the furnished original beside it where your MLS requires.
Can I remove furniture and add new furniture?
Yes, in two steps: empty the room, then stage it. That's two credits in PROMOREALTOR. Label the result as virtually staged.
Do I need to keep the original photo?
Yes. CRMLS wants the unaltered original immediately before or after the edited image 1.
What is the best way to remove furniture?
Move it out before the shoot. If you can't, use an editing tool and check the floor, shadows, reflections and fixtures.
Sources and how we checked
Prices and rules were read on the pages linked below on 2026-10-09. Vendors change prices often and some pages localise by country, so confirm on the vendor's page before you buy. Several price comparisons online are written by vendors; we use vendor pages for vendor prices and say when a figure comes from a vendor's own blog. This guide is information, not legal advice.
- CRMLS: Digitally Altered Image Guidance and FAQs (California AB 723 and CRMLS Rule 11.5.2) California Regional MLS knowledge base.
- ARMLS: Virtually Staged Photos (Disclosure of Digitally Altered Images, from 28 May 2026) Arizona Regional MLS.
- San Francisco Association of REALTORS: Digitally Altered Images (AB 723) A member guide, not the statute text.
- BoxBrownie: Pricing The page we read showed euros and may localise by country.
Keep going
Decluttering
Remove furniture, clutter, cars and bins from listing photos in about 30 seconds. €1 a photo, no subscription, no editor to learn.
Virtual staging
Furnish an empty room from a photo in about 30 seconds, or restyle an occupied one in nine styles. €1 a photo, no subscription.
AI photo disclosure rules
California AB 723, CRMLS and ARMLS rules for AI-edited and virtually staged listing photos: what counts as altered, what to label, and how to keep originals.
Staging before and after
Real before and after virtual staging results: what the AI changed, what it quietly fixed, and a seven-point check before you publish, with disclosure rules.